Roll Alignment
Roller parallelism with the PARALIGN service, created by PRÜFTECHNIK
Improve product quality and increase productivity through higher machine availability and higher production speed with expertly aligned rolls by Yellotec.
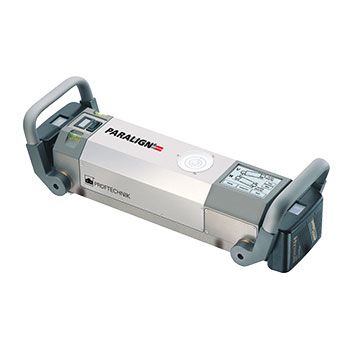
Yellotec utilises PRÜFTECHNIK’s PARALIGN®, a revolutionary roll alignment system, which for the first time uses inertial measurement technology in the form of three high precision laser gyroscopes. It provides reliable graphical and numerical information on all necessary corrective steps even in parts of machinery where measurements were not possible until now.
Thanks to the specialized sweep measurement method, it is not necessary to position PRÜFTECHNIK’s PARALIGN® absolutely tangential to the roll. Even if it is positioned at an angle, an exact and reproducible result is achieved.
Improve quality and avoid downtime
- Avoid creasing, non-symmetrical winding, inhomogeneous layer thicknesses
- Avoid web breaks and premature wear of system components
- Drastically reduced measuring time: Take advantage of even short downtimes for roller measurement
- Measurement results are not dependent on visual accessibility and different temperature profiles, for example in the measurement of dry sections.
- Measurement results and their analysis are immediately available on-site.
PRÜFTECHNIK’s PARALIGN® advantages
- Avoid creasing, non-symmetrical winding, inhomogeneous layer thicknesses
- Avoid web breaks and premature wear of system components
- Drastically reduced measuring time: Take advantage of even short downtimes for roller measurement
- Measurement results are not dependent on visual accessibility and different temperature profiles, for example in the measurement of dry sections.
- Measurement results and their analysis are immediately available on-site.
How it works
PARALIGN uses ring laser gyroscopes in an inertial measurement system that quickly and accurately measures vertical and horizontal roll alignment and compares results against a benchmark standard. Ring laser gyroscope technology was first developed for aerospace guidance, navigation and control systems.
How it’s done – step by step
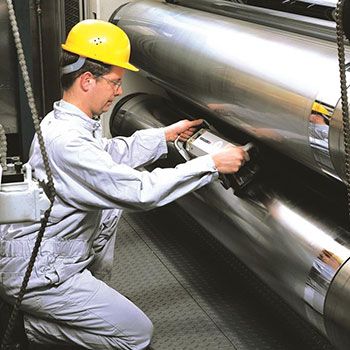
In order to determine whether several rolls are positioned parallel to each other, PARALIGN is first placed on the „reference roll“and zeroed by pressing the button. The measurement system is then simply placed on the roll to be measured and –after a few seconds– the deviation from the reference roll can be read – simultaneously displayed as the main degrees of freedom of a roll: pitch and yaw. The third roll is then measured, etc.
Three ringlaser gyroscopes inside
PARALIGN contains three perpendicularly arranged, highly-precise ringlaser gyroscopes as used in aircraft and spacecraft. Just like a spinning top, the ringlaser gyroscopes have an inherent inertia, i.e. they tend to resist any attempt to change the orientation of the rotational axis in space for a certain length of time. If PARALIGN is then placed on the reference roll, it first “learns“ its position in space and then compares this with the changes in direction that result when it is moved onto the roll to be measured. The deviations are measured and converted into correction values.


